You can add your own custom header to the different Appointiv email templates.
What's needed for this?
- A little bit of HTML knowledge
- A Salesforce admin access high enough to edit the Email Templates
- Your graphic needs to be saved in a static URL so it can be inserted via HTML
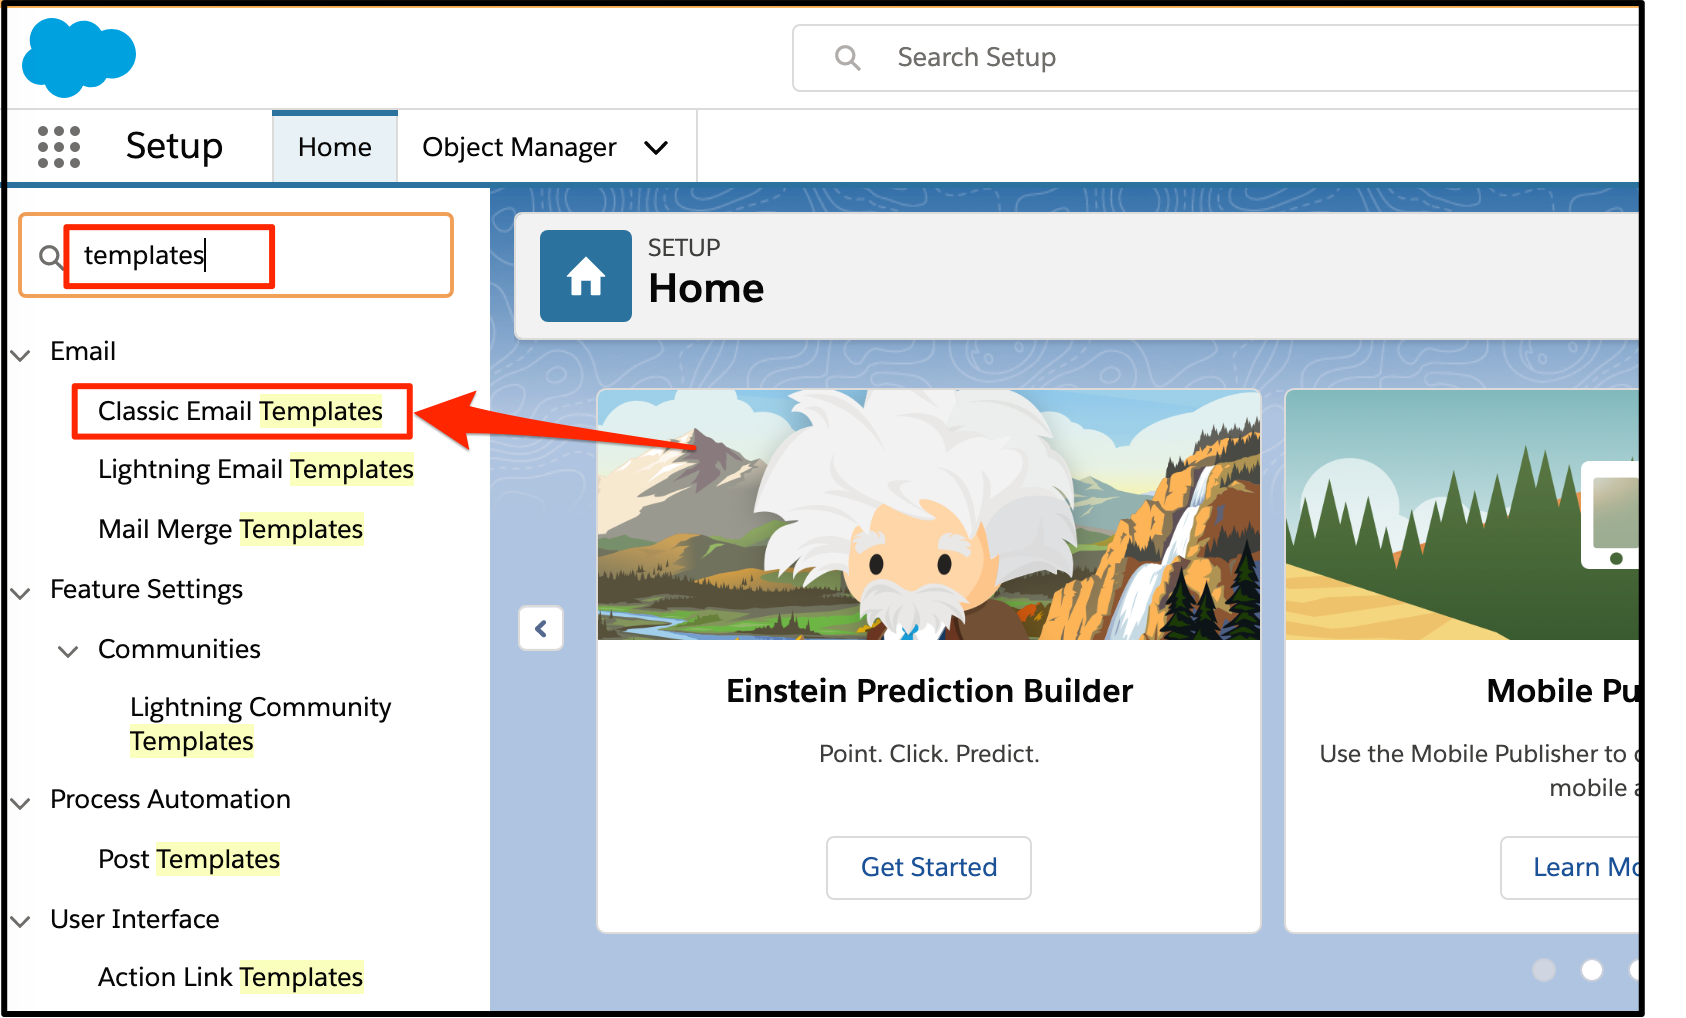
First, go to your Salesforce Setup area:

Next, type Templates into the quick search box and click on Classic Email Templates:
Next, select the "Appointed Email Templates" folder at the top of the Classic Email Templates section. (Appointed is an old name we can't completely get rid of... ) You'll see a long list of Visualforce templates.

These are "Visualforce" Templates and come from a Managed Package so you don't have complete control of them but you can insert a graphic.
Don't worry if the email preview looks like it is missing your custom content- that gets added by the app when it sends the message out. The source for the custom information that gets added according is set up separately in the Email tab in the Appointiv Configure section which is here- Config Tab 2: Email Template
The templates you want to change are the ones with no description - there are three of each: one for Account, Contact, and Lead. And there are four overall templates: New, Update, Cancel, and Reminder. So, doing the math, that's 12 templates you need to add your logo onto... If you're not using Leads then skip those but do them all just to be safe. It doesn't take long after you know what to do.
So here's what to do-
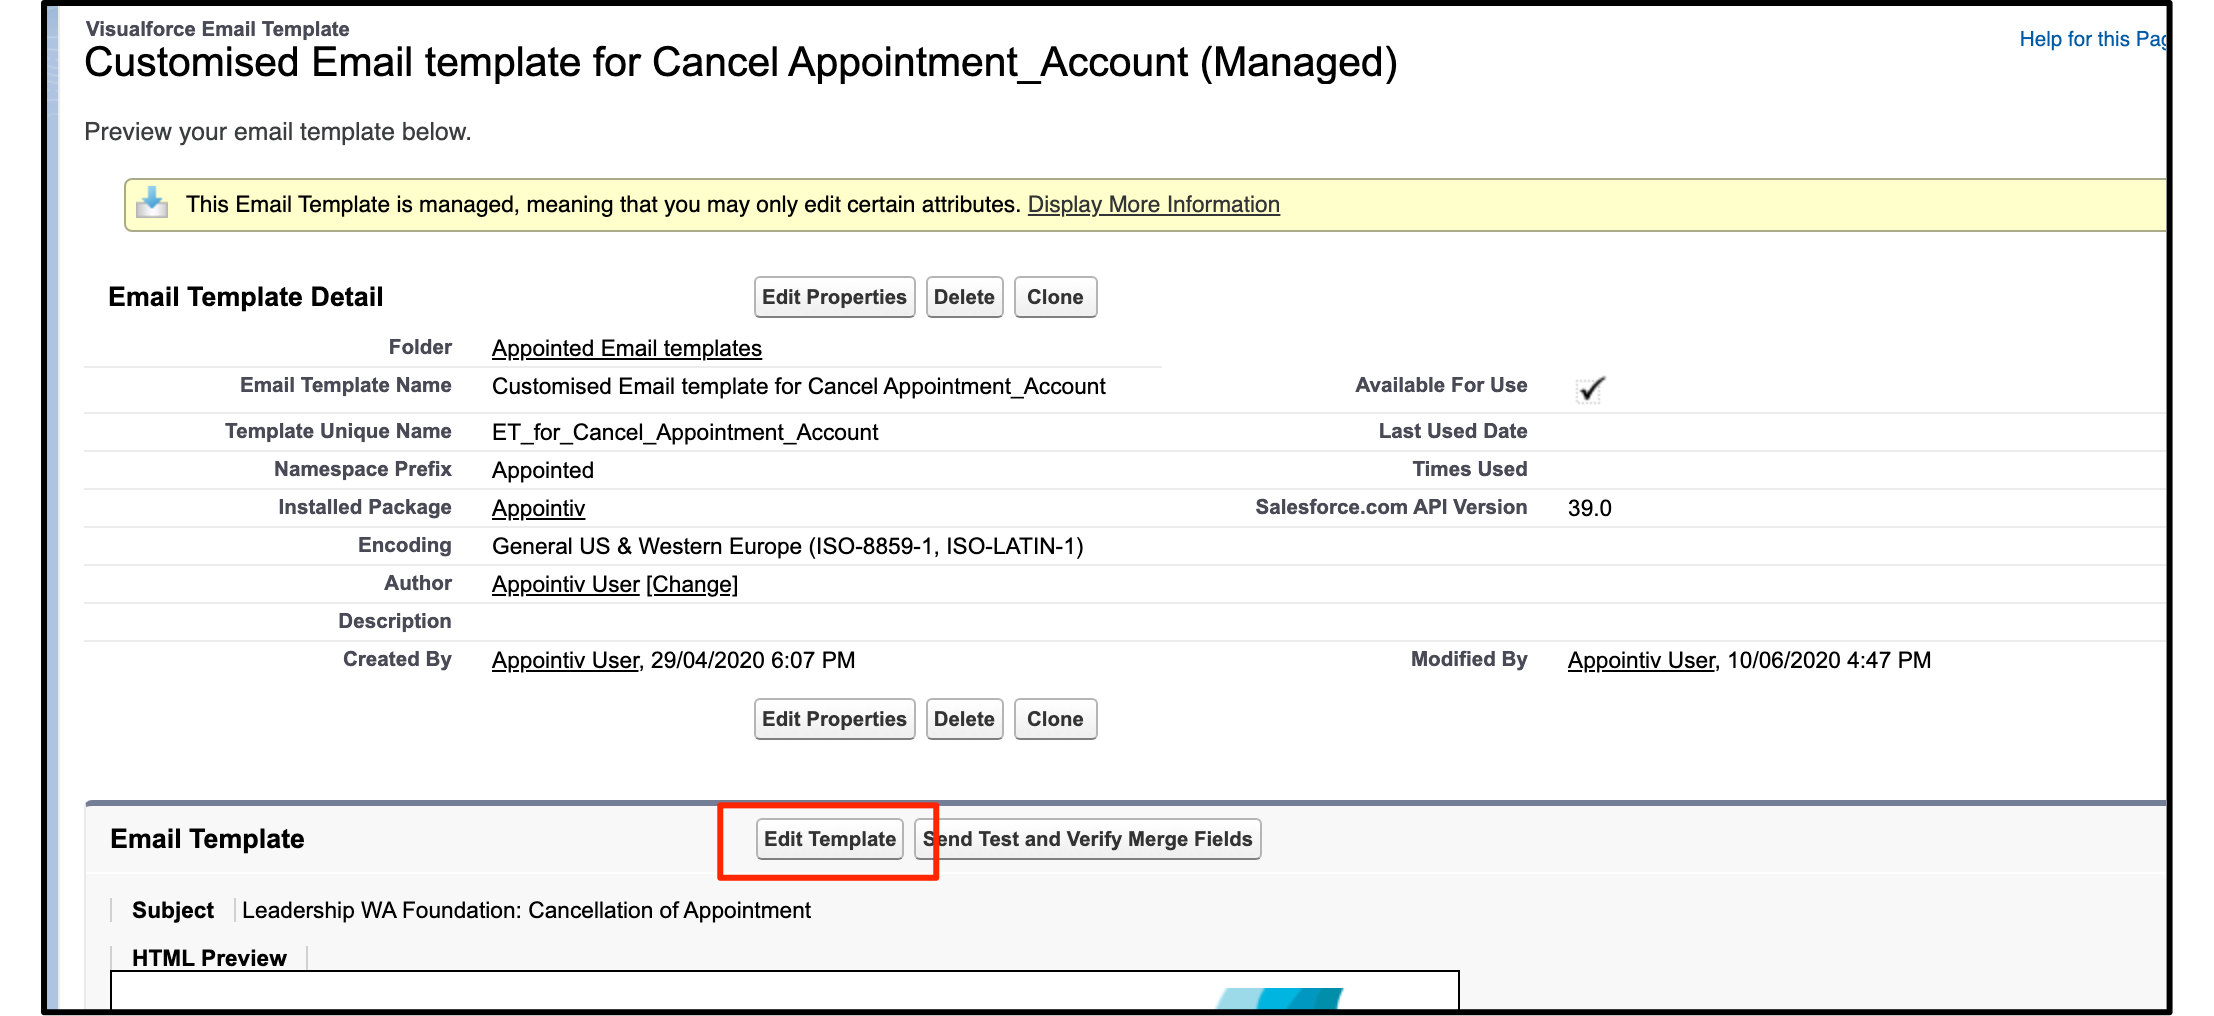
Click on one of the template names to open the template editor:

Click on "Edit Template"
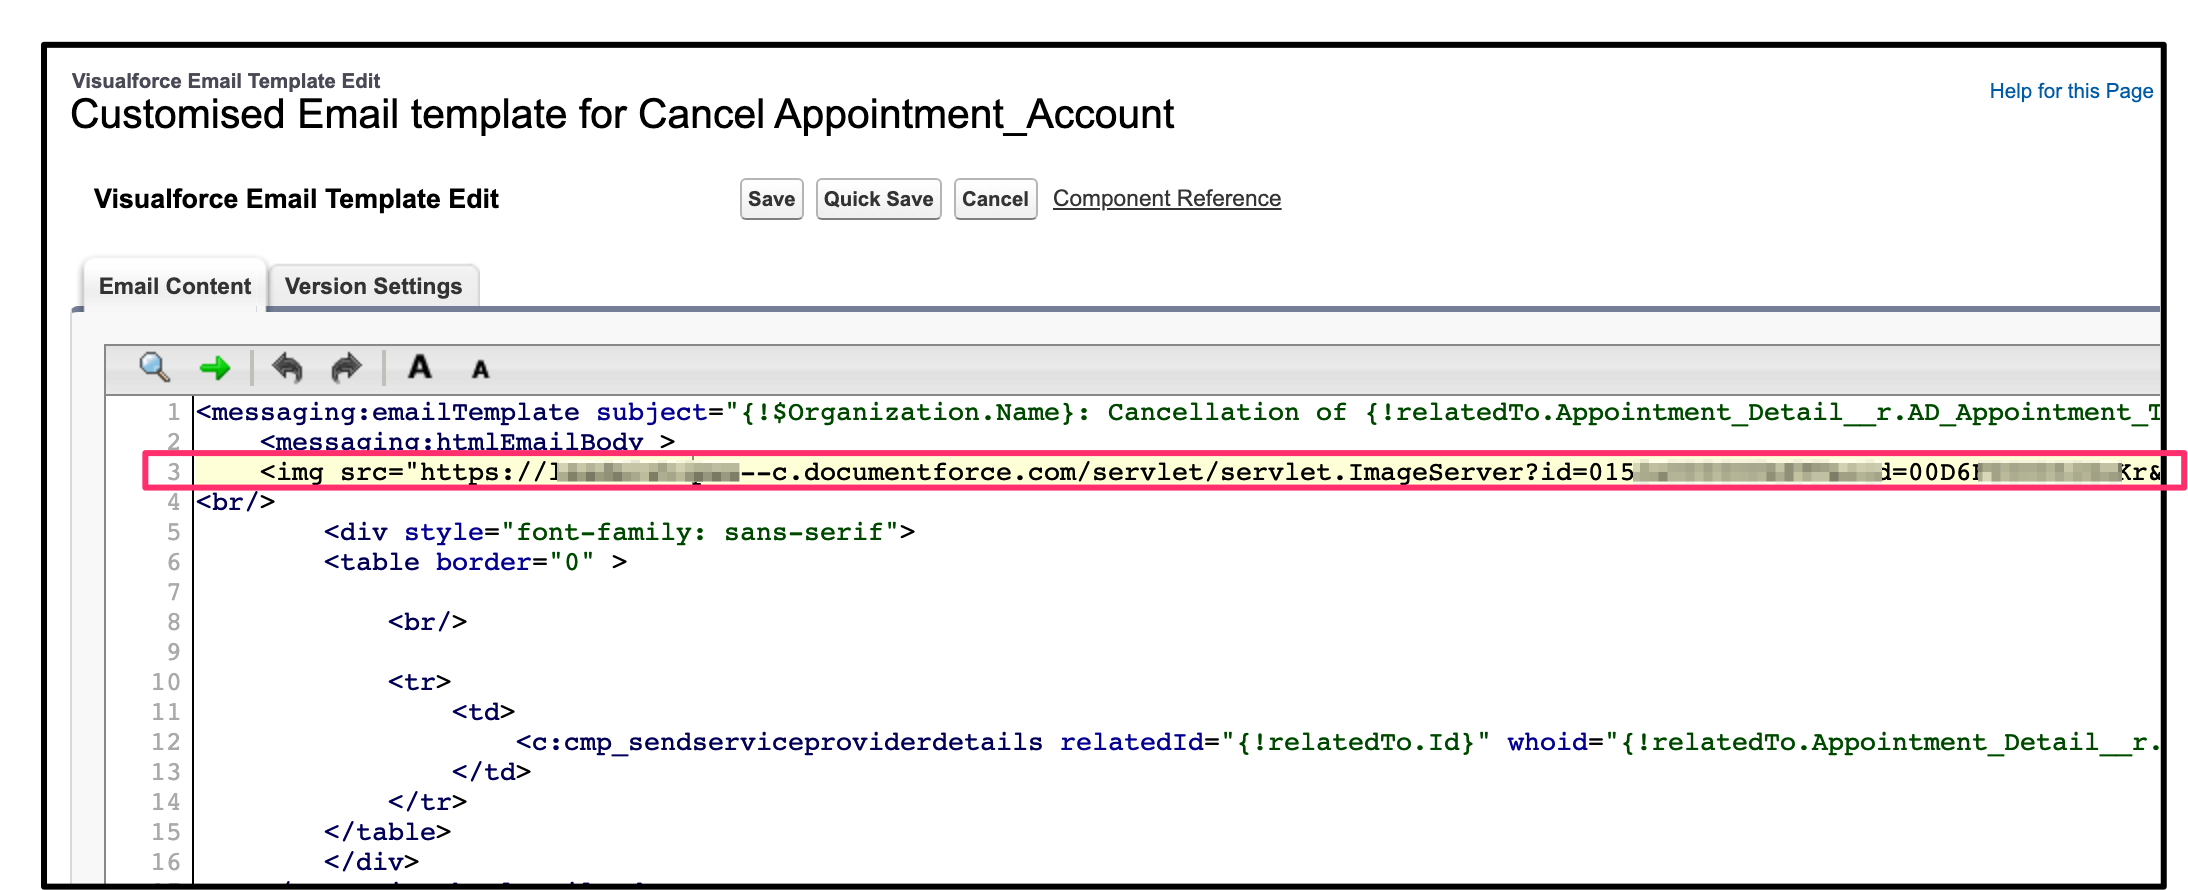
Create your image HTML code to insert by adding your image's static URL into this formula - include the quotes " before and after your URL address
<img src="your static URL" width="650" />
Insert your HTML code in the line just after the <messaging:htmlEmailBody > which means line 3 in the current version of the templates I'm using in this example.
Here's how it looks in one of our customer's accounts - the URL is quite long so you can't see the end of the code:
Here's the end of the code for completeness....
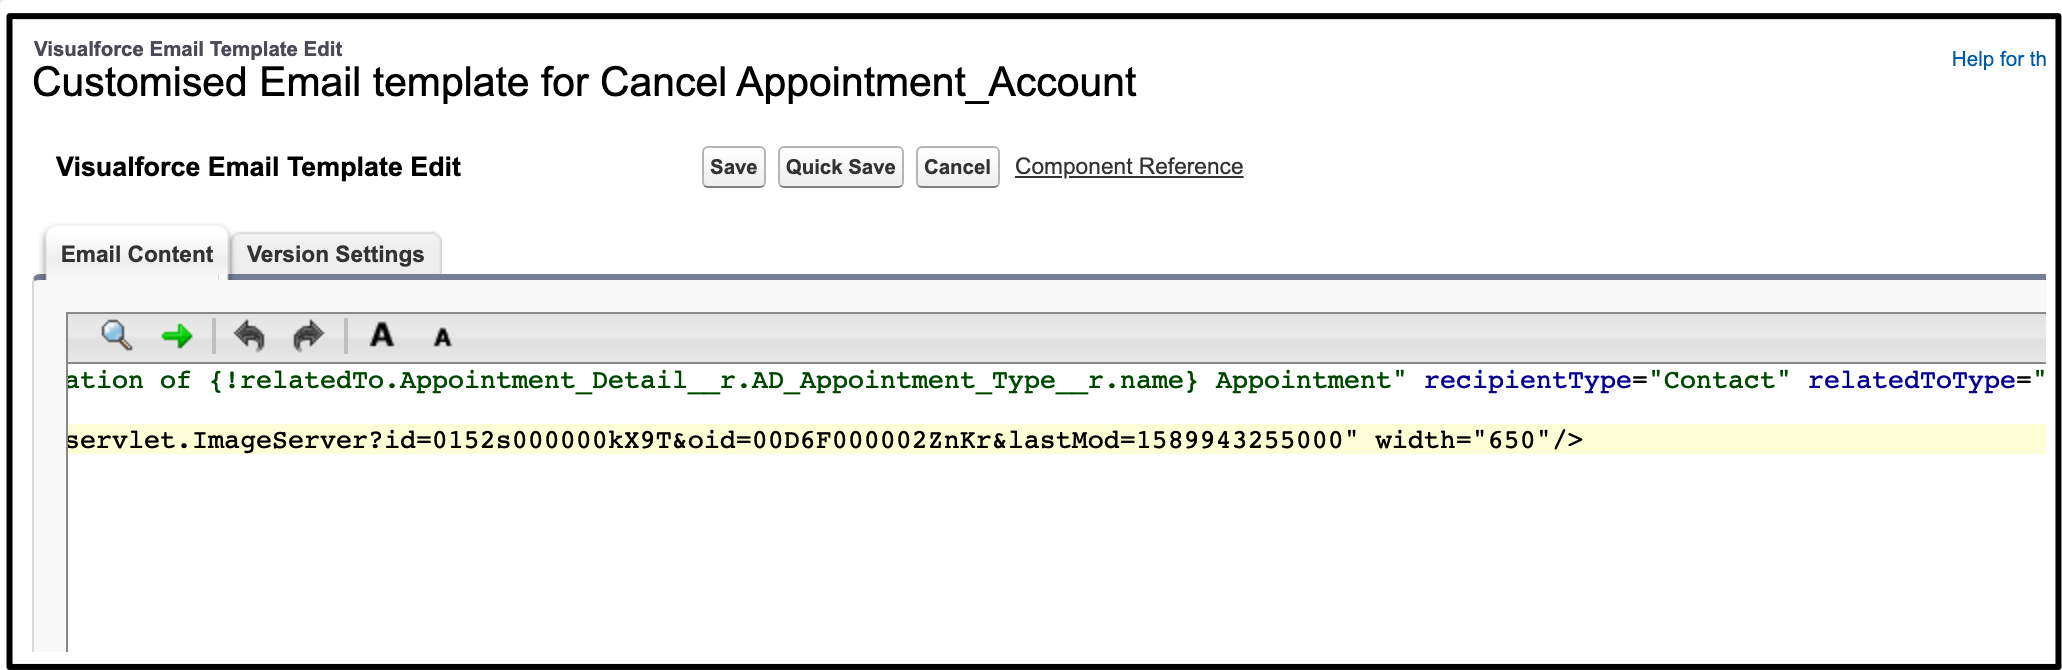
Save, and you're done. Now just do that 11 more times in each of the other templates, haha. See how fast you can do it and put that in the comments below. :)
Comments
0 comments
Please sign in to leave a comment.